PythonのFlaskを使ったmTLSのクライアント証明書のテスト環境構築方法について説明します。
認証局の作成
認証局の秘密鍵 (ca.key) とルート証明書 (ca-crt.pem) を作成します。
$ openssl req -nodes -new -x509 -days 365 -keyout ca.key -out ca-crt.pem \
  -subj "/C=JP/ST=Tokyo/L=Chiyoda/O=TeX2e/CN=rootca.example.com"
サーバ証明書の作成
サーバの秘密鍵 (server.key) とサーバ証明書用のCSRファイル (server.csr) を作成します。 また、サーバ証明書用のCSRファイルを元に、認証局の秘密鍵とルート証明書から、サーバ証明書 (server.crt) を作成します。
$ openssl req -nodes -new -keyout server.key -out server.csr \
  -subj "/C=JP/ST=Tokyo/L=Chiyoda/O=TeX2e/CN=server.example.com"

$ cat <<'EOS' > san.txt
subjectAltName = DNS:server.example.com, IP:127.0.0.1
EOS
$ openssl x509 -req -days 365 -in server.csr -CA ca-crt.pem -CAkey ca.key -CAcreateserial -out server.crt -extfile san.txt
最後に確認として、作成したサーバ証明書が有効か検証します。
$ openssl verify -CAfile ca-crt.pem server.crt
クライアント証明書の作成
クライアントの秘密鍵 (client.key) とクライアント証明書用のCSRファイル (client.csr) を作成します。 また、クライアント証明書用のCSRファイルを元に、認証局の秘密鍵とルート証明書から、サーバ証明書 (server.crt) を作成します。
$ openssl req -nodes -new -keyout client.key -out client.csr \
  -subj "/C=JP/ST=Tokyo/L=Chiyoda/O=TeX2e/CN=client.example.com"

$ openssl x509 -req -days 365 -in client.csr -CA ca-crt.pem -CAkey ca.key -CAcreateserial -out client.crt
最後に確認として、作成したサーバ証明書が有効か検証します。
$ openssl verify -CAfile ca-crt.pem client.crt
mTLS検証用のPythonサーバ
PythonのFlaskを使ってクライアント証明書が必要なWebサイトを作成することができます。 mtls.pyの内容は以下の通りです。
from flask import Flask
import ssl

app = Flask(__name__)

@app.route('/ping')
def ping():
    return 'pongers'

if __name__ == '__main__':
    context = ssl.SSLContext(ssl.PROTOCOL_TLSv1_2)
    context.verify_mode = ssl.CERT_REQUIRED
    context.load_verify_locations('ca-crt.pem')
    context.load_cert_chain('server.crt', 'server.key')
    app.run('0.0.0.0', 10443, ssl_context=context)
mtls.pyファイルを作成したらWebサーバを実行します。
$ pip3 install flask
$ python3 mtls.py
curlを使ったmTLS通信
まず事前準備として、hostsに 127.0.0.1 server.example.com を積んでおきます。
FlaskでWebサーバが起動している状態で、curlでアクセスします。
アクセスするには、クライアント証明書は --cert で指定する他に、その秘密鍵 --key と認証局のルート証明書 --cacert が必要となります。
$ curl --cacert ca-crt.pem --key client.key --cert client.crt https://server.example.com:10443/ping
ブラウザを使ったmTLS通信
サーバ証明書のインストール
Windowsにクライアント証明書をインストールするために、サーバ証明書をPFXファイルに変換します。変換後は server.pfx をWindowsにダウンロードしてきてダブルクリックでインストールします。
$ openssl pkcs12 -export -out server.pfx -inkey server.key -in server.crt -certfile ca-crt.pem
Enter Export Password: (任意のパスワードを入力)
Verifying - Enter Export Password: (任意のパスワードを入力)
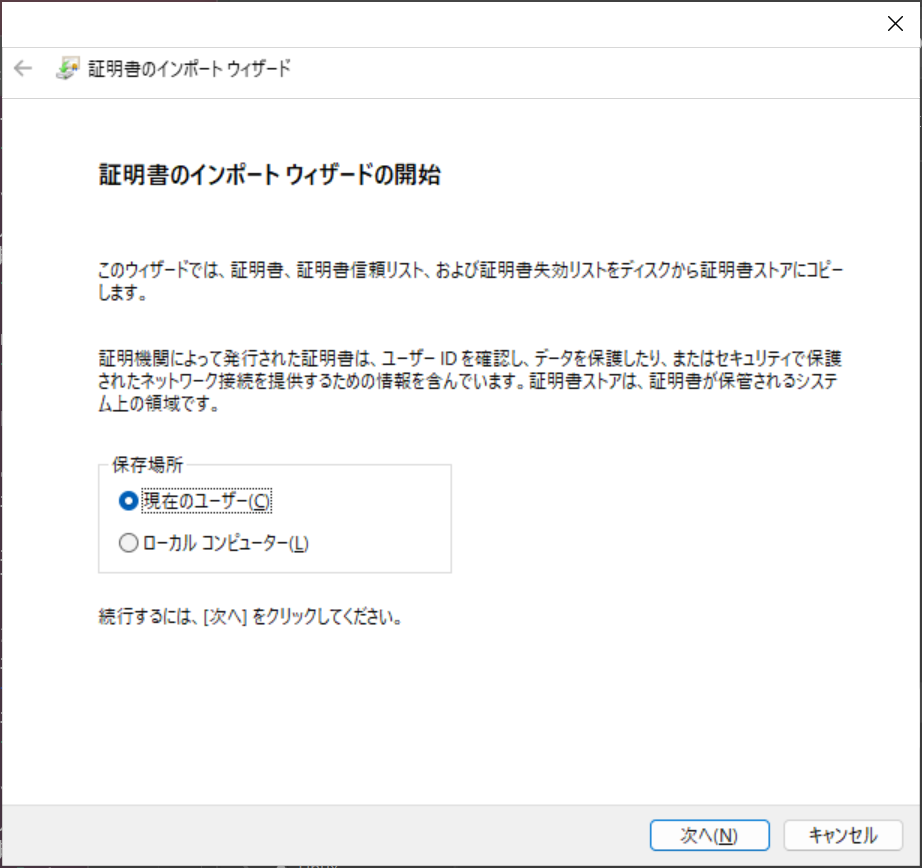
インストール時のサーバ証明書の保存場所は「現在のユーザ」を選択します。余談ですが、PCのすべてのユーザ(サービスも含む)に対して証明書を使えるようにするには「ローカル コンピュータ」を選択します。
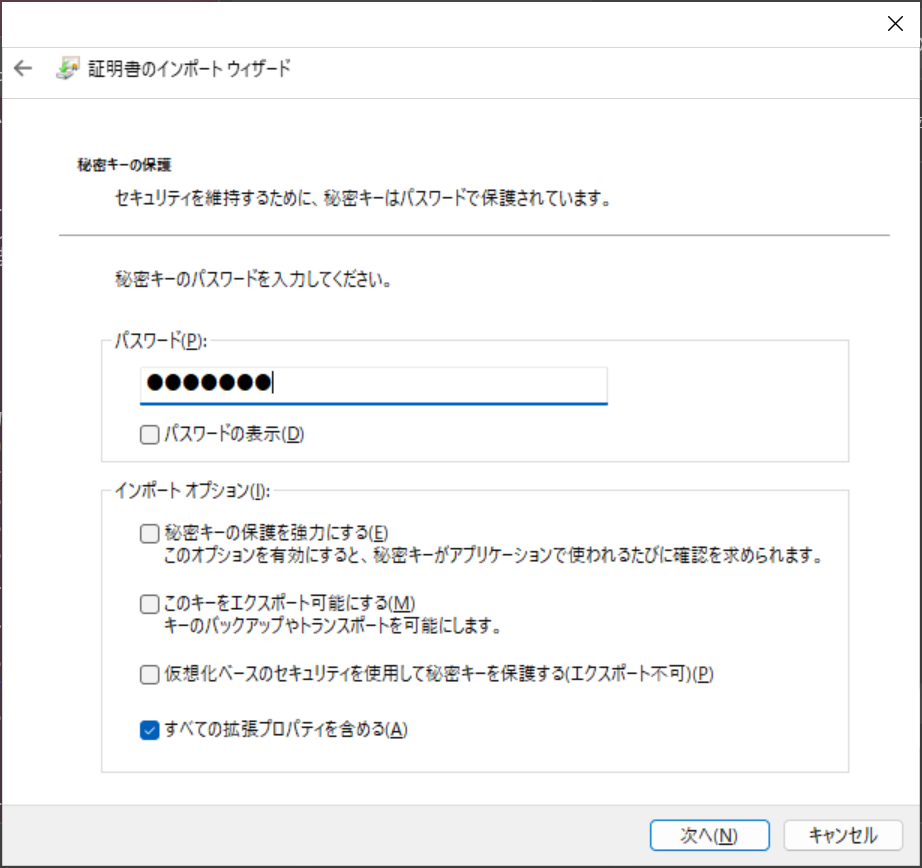
パスワードは、PFXファイルに変換した際のエクスポートパスワードを入力します。
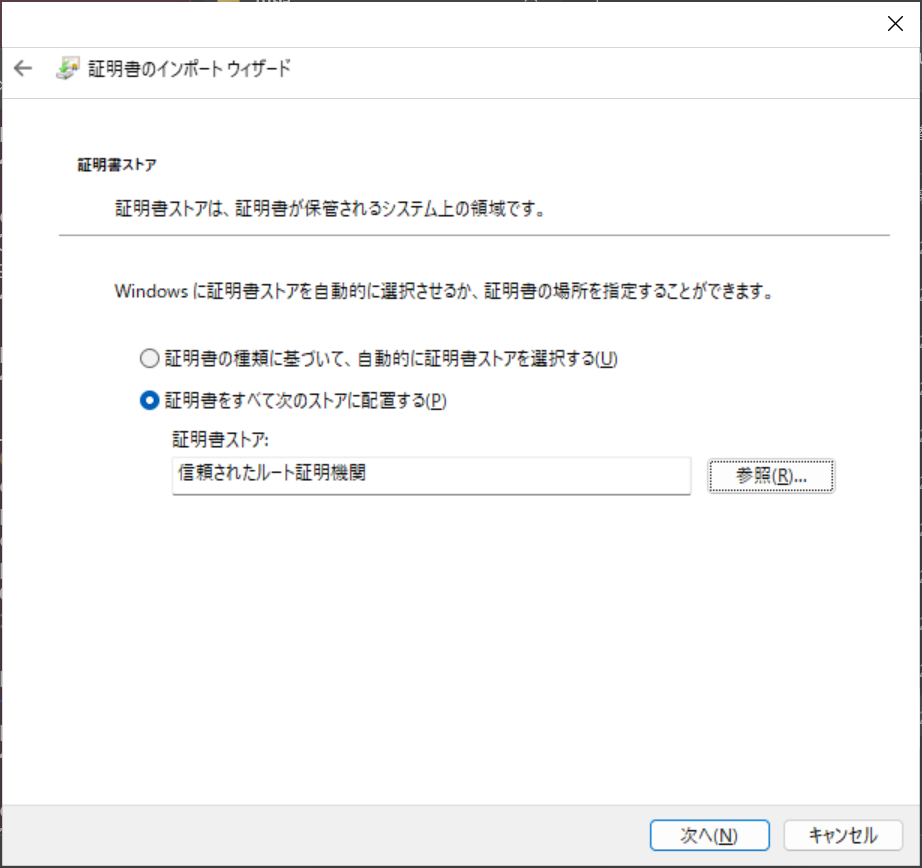
インストール先の証明書ストアは「信頼されたルート証明機関」を選択します。
クライアント証明書のインストール
クライアント証明書も同様に、PFXファイルに変換して、server.pfx をWindowsにダウンロードしてきてダブルクリックでインストールします。
$ openssl pkcs12 -export -out client.pfx -inkey client.key -in client.crt -certfile ca-crt.pem
Enter Export Password: (任意のパスワードを入力)
Verifying - Enter Export Password: (任意のパスワードを入力)
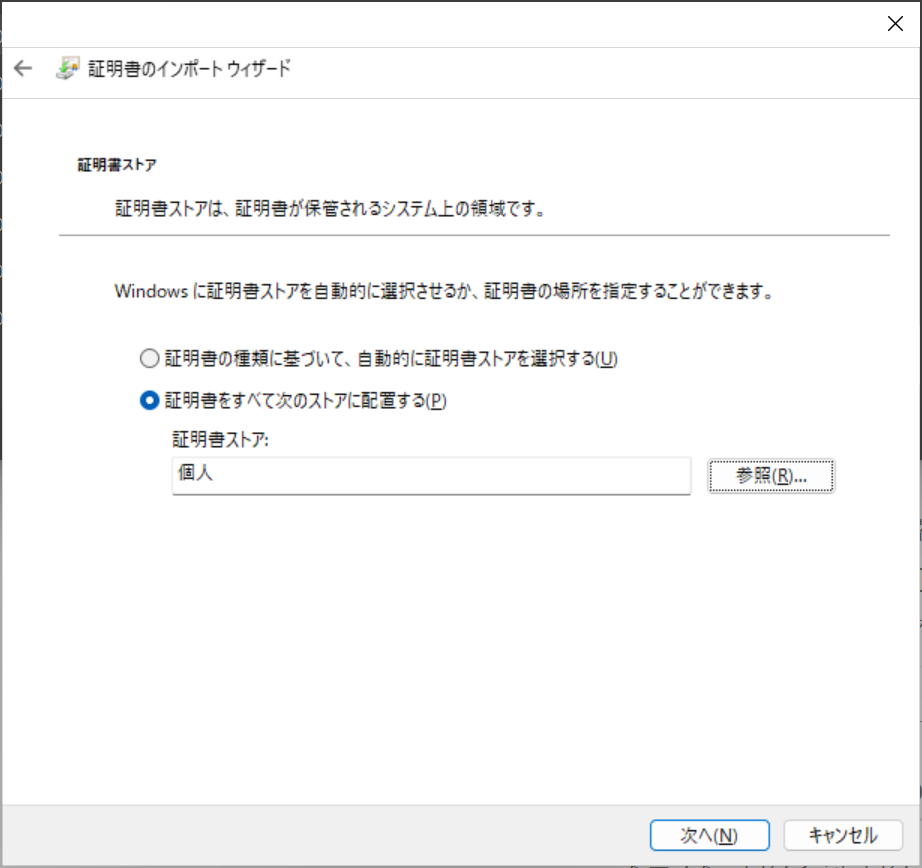
手順は同じ流れになりますが、インストール先の証明書ストアは「個人」を選択します。
ブラウザからアクセスして確認
起動しているFlaskサーバに対してブラウザのURLから https://server.example.com:10443/ping でアクセスします。
ブラウザでアクセス後に以下のようなダイアログが表示されればOKです。
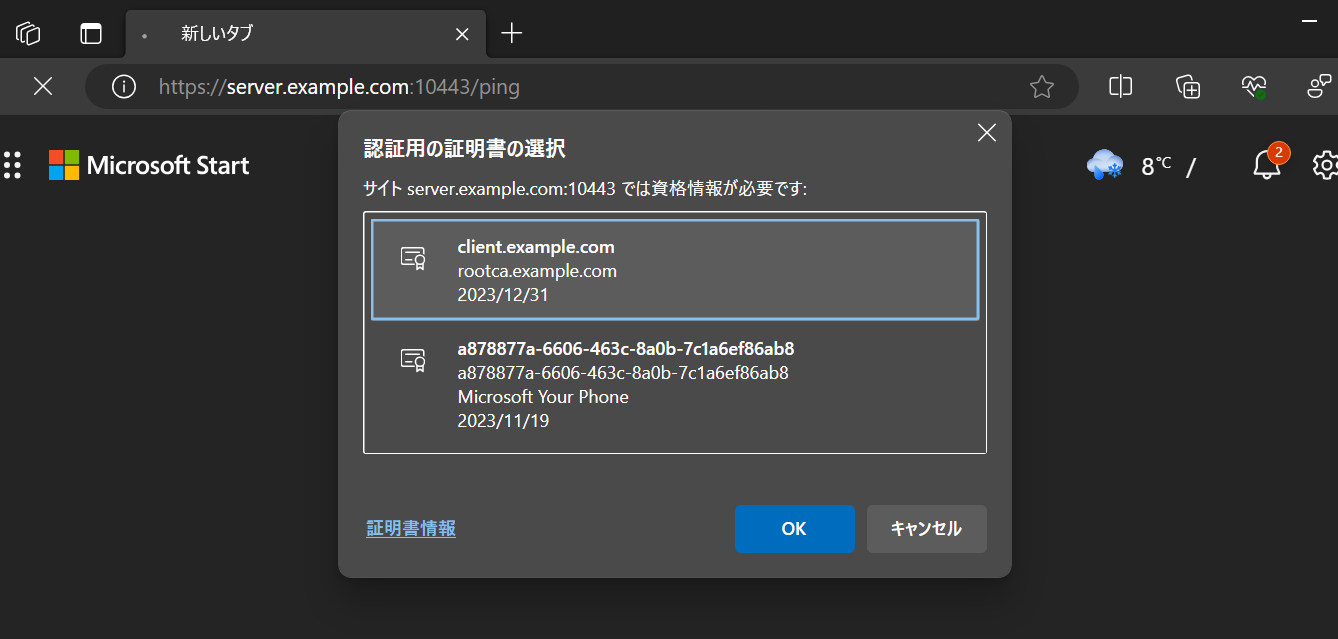
自分で作成したクライアント証明書の client.example.com を選択してページが表示されれば、クライアント認証成功です!
以上です。